Ubuntu has already an application called Startup Disk Creator, but this can only be used to make Linux bootable USB drives. To make a Windows bootable USB there is an application called WinUSB but it hasn’t been updated for a while.
The following guide works on any Linux distribution as long as it has GRUB and GParted installed and can make bootable USB for any Windows version newer than Vista (including Vista too).
Choose whatever method is suitable for your computer (either MBR for BIOS or GPT for UEFI – do NOT follow both tutorials as you’ll get a non-bootable USB). Note that the drive made for UEFI will not boot on BIOS computers.
MBR for BIOS
This is intended for older PCs that use BIOS. The USB can also be used on UEFI computers in CSM boot mode. A msdos partition scheme and a bootloader will be required.
1. Format USB
This is the first step. Although it can be done from Terminal, GParted has a nice GUI and it is easy to use for this. So, plug in your USB and start GParted (root permissions required). Select the USB drive and unmount it, otherwise you won’t be able to format it.
 |
| GParted main window. The first thing to do is select the USB drive. |
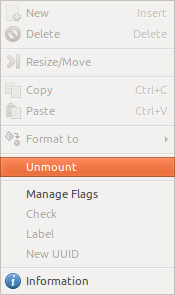 |
| Right-click the USB drive partition and select Unmount |
You must re-create the partition table by going to the Device menu then select Create Partition Table. Choose msdos and click Apply. Note that it may work with a simple formatting without rewriting partition table.
 |
| The Partition Table dialog. |
Right click the unallocated space and select New. Make a primary NTFS partition and give it a label too. Remember the label as you will need it later.
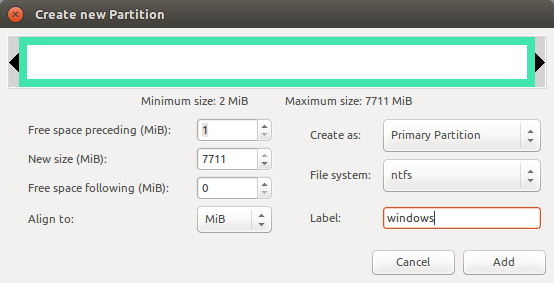 |
| New Partition dialog. |
Apply all pending operation from Edit menu – Apply all operations or click the button on the main window. Right click the partition and add the boot flag by selecting Manage Flags and tick the checkbox next to boot.
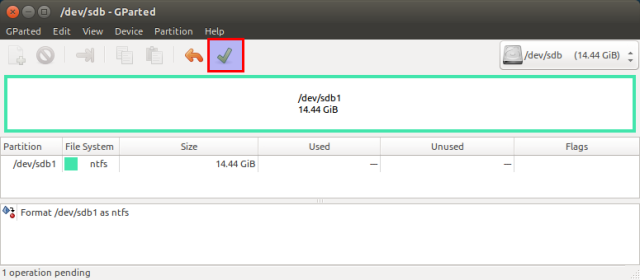 |
| The Apply button from the main window of GParted |
When installing bootloader, a partition UUID must be specified. So, right-click the partition again and select Information. Write down that UUID as you will need it later.
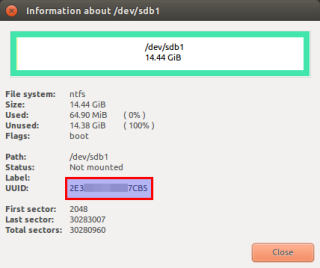 |
| The Information dialog showing UUID |
2. Copy Windows files
Quit GParted and use the file manager to copy all files from Windows ISO to USB stick. Mount the ISO using Open with – Disk Image Mounter (if you use Nautilus as a file manager). Then select all files Ctrl+A and Copy to USB drive which will be automatically mounted when you click on it at /media/<username>/<drive_label>. After the copy process is finished, look in the USB root folder for the boot directory. If it is uppercase, rename it to lowercase.
3. Make it bootable
GRUB will be used for that. Open a Terminal and run:
sudo grub-install --target=i386-pc --boot-directory="/media/<username>/<drive_label>/boot" /dev/sdX
Replace:
- /media/<username>/<drive_label> with the path where USB drive is mounted
- /dev/sdX with the USB drive, not the partition (e.g. /dev/sdb)
Installing for i386-pc platform.
Installation finished. No error reported.
grub-install: error: /usr/lib/grub/i386-pc/modinfo.sh doesn't exist. Please specify --target or --directory.
Install the grub-pc-bin package with sudo apt-get install grub-pc-bin and try again.
Now, create a text file and write the following in it:
default=1
timeout=15
color_normal=light-cyan/dark-gray
menu_color_normal=black/light-cyan
menu_color_highlight=white/black

menuentry "Start Windows Installation" {
 insmod ntfs
 search --no-floppy --fs-uuid <drive_UUID> --set root
 chainloader +1
 boot
}

menuentry "Boot from the first hard drive" {
 insmod ntfs
 insmod part_msdos
 set root=(hd1)
 chainloader +1
 boot
}
Replace <drive_UUID> with the UUID from step 1. Save the file as grub.cfg and put it on the USB drive in the boot/grub folder.
That’s it. The USB drive is now bootable from BIOS (not UEFI) and can be used to install Windows on your PC. The first time you boot from it select Start Windows Installation. Tested with Windows Vista, but it should work with any newer version.
GPT for UEFI
UEFI boots from GPT schemed drives. No bootloader is required because EFI firmware can read FAT32 partition contents by itself. It looks for a specific firmware and if it founds it then loads it into RAM. Without a MBR bootloader the USB will not be bootable for BIOS computers. Only 64 bit versions of Windows 7 and newer are supported according to eightforums.com.
1. Format USB
Plug in the USB drive and launch GParted. Unmount the drive as shown above. Create a GPT partition table by selecting from Device menu Create Partition Table option. Choose gpt and apply.
 |
| The Partition Table dialog |
Now right-click the unallocated space and create a new partition. It must be primary and formatted as FAT32. Give it a label too.
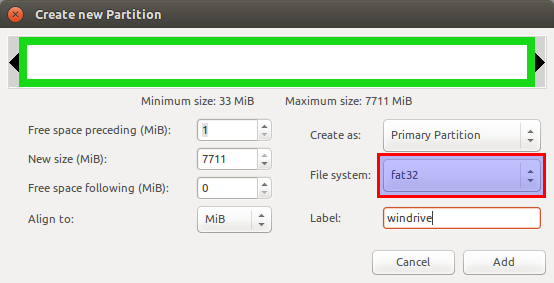 |
| New Partition dialog |
Don’t forget to apply all pending operations Ctrl+Enter.
2. Copy Windows files
Quit GParted and use the file manager to copy all files from Windows ISO to USB stick. Mount the ISO using Open with – Disk Image Mounter (if you use Nautilus as a file manager). Then select all files Ctrl+A and Copy to USB drive which will be automatically mounted when you click on it at /media/<username>/<drive_label>. After the copy process is finished, look in the USB root folder for the efi/boot directory. If there’s a bootx64.efi file there skip to step 3.
If the OS you are making a bootable USB for is Windows 7, browse the efi/microsoft folder and copy the entire boot folder from this path one level up in the efi folder. Merge folders if boot already exists.
Here is what to do if you don’t have the bootx64.efi file in efi/boot folder. Browse into the mounted Windows ISO image into the sources folder. Open install.wim with your archive manager (you will need 7z installed). Go to the path ./1/Windows/Boot/EFI and extract the file bootmgfw.efi anywhere you want. Rename it to bootx64.efi and put it on the USB drive, in the efi/boot folder. If you can’t find bootmgfw.efi in install.wim then you probably have a 32 bit Windows ISO or other types of images (recovery disks, upgrade versions).
Some UEFI firmwares are able to boot from NTFS and/or MBR partitions too as long as the bootx64.efi file exists at the right locations.
3. Make it bootable
It should be bootable. You can boot from USB now. The Windows-only utility Rufus does exactly the same thing when UEFI/GPT mode is selected.
Unless you can’t, do the following.
Launch GParted again and select your USB drive. Right-click the partition and assign it the boot flag (esp will get checked too). Note that msftdata will get unchecked. This boot flag makes the USB drive act as an ESP (EFI System Partition) so the first thing you’ll notice is that your OS (both Linux and Windows) is no longer auto mounting it. Do not boot your Linux OS with that USB plugged in (it may get automatically mounted at /boot/efi or something like that and it may interfere with the bootloader from HDD). To get back the USB drive, plug it in with the PC on, open GParted and check back msftdata.
If this didn’t work too, start over again but this time apply the msdos partition table instead of gpt. There will be no msftdata flag this time and boot flag has a totally different meaning.